The yardwork is calling. There were indoor projects planned. I've been battling colds and seasonal allergies. And there are never enough hours in the day.
But I did finally put away the Christmas table runner this week. In my defense, it's not technically a Christmas pattern. It's just green, gold and red.
Yeah, kind of Christmas-y.
Our dining room table is large (one of my pet peeves is being crowded when I'm eating), so a custom runner was necessary. I finally found a print that could carry me through several seasons, Christmas excluded!
This is so easy to make, you hardly need a tutorial. First, determine the width and the overall length of the runner. I like the points to hang about 3 inches above the chairs at the head of the table. If you are sewing the seams, add a half inch seam allowance to all sides. You can use Stitch Witchery as well. Just add the necessary allowance to create a hem when you fuse it in place.
If you are using a sewing machine, fold one side under 1/4 of an inch then fold it over again 1/4 inch. Stitch along the edge. If you are using Stitch Witchery, just fold it over as much as you need to cover the fusing and iron according the manufacturer's instructions. Repeat on all four sides.
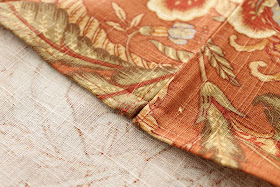
Fold each end neatly to make a point and press with an iron.
Tack the flaps in place with about a 4-6 inch long seam.
If your fabric has a print and you can match the thread closely, you'll hardly see the stitching on the front side.
That's all there is to it!


No comments:
Post a Comment
Will blog for comments! Talk to me.