Wednesday, December 28, 2011

Best of 2011

Ready for another "Best of 2011" post?

Yeah, I thought so.  Let's get to it.

10. Handpainted "Bienvenue" sign

I loved this sign!  I'm always on the hunt for another old cabinet door like it so I can make another.


9. Dumpster Rescue Chest of Drawers


Poor thing had names of hair bands scratched on its drawers, but it's been cleaned, painted and given a new life in my craft studio.


I added visual length to tiny basement egress windows.  It took two tries, but it's finally how I wanted it...at least for now.

7.  Adding Patina to a Concrete Birdbath


I used outdoor craft paint and lots of ebow grease to add years to a new concrete bowl.

6. Lantern Love


Lanterns were everywhere this year and I had to have one.  A big one please, but not a big price.  ReStore to the rescue!


What dog doesn't love a good makeover?  I pulled the stuffing from the old smooshed bed and made a classic basket sans canine-themed print. 


Stay tuned because I'm not finished with this built-in yet!


Poor little thrift store cabinet was covered in gobs of glossy brown paint.  Amazing what a little love and A LOT of paint stripper can do.

2.  Potting Bench


What to do with an old garage workbench left behind by previous homeowners?  Turn it into a potting bench, of course.

1.  Disappearing Nine-Patch Quilt


This project gets top honors because it took me 10 months to complete it.  Then I gave it away.  And that felt so good.


Thank you for joining me for another year.  2011 wasn't a big year for projects at Casa de Tallgrass, but I have high hopes and big dreams for 2012.  I hope you join me!


Thursday, December 15, 2011

A Long Weekend Treat

After an insanely busy week and looking ahead to Christmas next weekend (yikes!), I'm taking a few days off, so my Etsy shops will be on vacation until December 20.


The cherub again.  A pumpkin for autumn.  Christmas ornament for winter.  Easy choices.  (See his before here.)

Now what should he hold in January???

Tuesday, December 13, 2011

Under the Mistletoe


Mistletoe hanging in the foyer.  There's no getting past it!  :)

Monday, December 5, 2011

Comfort and Joy

During garage sale season, I'll scour Craigslist for the free leftovers people put at the curb after the sale has ended.  One summer I found a darling vintage sleigh.  The homeowner said his wife was debating whether or not to part with it, but it was clear he wanted it GONE.


I wasn't going question his judgment.

A few weeks ago at the holiday open house held at a local antique store I found a sweet teddy bear.  He's not really an antique, but he's jointed and his fur shows that he's been well loved.  And he was only seven dollars.

(I only felt slightly foolish carrying him around the store while I continued to shop.)

I could see him dressed in a fancy vest with holiday trimmings and sitting on the sleigh under the tree.  So I fashioned a vest from some scrap fabric.


His jointed arms made it easier to tailor the vest for a close fit.  I used some spare buttons I had on hand.  I purposely designed his vest to be open at the bottom so his tummy would show.  The bead-and-berry pick came from a box of chocolate from a past Christmas.


Isn't he darling?


Thursday, December 1, 2011

Re-Purposed Drawer

I usually pass by old drawers at ReStore, but this one caught my eye.


Ewww!

But I liked its size and price tag (one dollar).  I considered making a big tray out of it, but I really didn't have a solid plan.  So rode around in the truck of my car all summer.

Tell me I'm not the only one with this problem.

Finally, inspiration struck.  Actually, I had outgrown my previous storage for craft paint, the thrift store spice rack.


The old drawer was the perfect depth to be made into shelves.  First I removed the tracks and peeled away the nasty contact paper, which was brittle and came off easily.  Next, I cut shelf supports from a 1/2 inch square dowel rod and glued them to the sides.


The shelves are 1/4" x 3" pieces of craft wood.  And yes, that's a chip clip holding the first shelf in place while the glue dries because I didn't want to search in the garage for proper clamps.

And here's the end result:


Since the wood for the shelves is about a quarter of an inch deeper than the drawer, I dog-eared the ends so they would transition better into the frame.


It will be so nice to have all most of my craft paint visble and within reach!


I'm linking up...

Monday, November 28, 2011

Looking Like Christmas


Did you score any great Black Friday deals?  We only had two items on our shopping list: new pillows for the bed (on sale for half price) and a new desk chair for the office.

Pillows?  How boring is that?

We didn't venture out until 1:00 on Friday, and we had to go to two Office Max stores to find the chair we wanted.

I was itchy to get home so I could start Christmas decorating.

This tray has become one of my favorite holiday decorations.


I made one of my Christmas pillows just for the living room.


I usually make these from linen, but it's too light for this room with its olive green walls (what was I thinking?)  I make much prettier ones for my Etsy shop.

I stayed up until one o'clock Saturday morning.  And then I slept like a baby on my new pillows.

Wednesday, November 16, 2011

A Real Laundry Room

If you have a pretty, spacious laundry room, you can just stop reading now.

If you have a tiny, windowless laundry room, this post is for YOU.

My laundry room is only 62 inches by 62 inches.  Yes, I measured.

Laundry isn't one of my favorite chores.  Then things got out of control in the laundry room and I really started to dread doing laundry.


Yeah, that's an ugly mess.

The first step was obvious: Get the dirty stuff off the floor and into the washer and the piles of clean clothes needed to be put away.

Our laundry room has to double as a pantry for overflow items from the kitchen.  Since the ceilings are 9 feet tall, I had added a second shelf above the original a few years ago.  I reorganized the shelves to put the stuff I use regularly within easy reach.

I made a trip to Lowes and Home Depot to check out some organizers.  I had thought about putting a shallow shelf right above the washer and dryer until I spotted these hanging baskets.  Perfect!


My mantra in a tight workspace is keep it open and keep it within reach.  So I removed the lid off the loose change jar and took the extra drinking straws out of their flimsy box.


Next I rounded up all the paper products and stashed them in a pretty basket.


Small bottles don't stay upright on these wire shelves, so I made a tray for them out of the lid from a copy paper box.  I covered the cardboard lid using heavy cotton decorator fabric and a glue gun.


And the odd-sized items go into their own basket.

With several large items on the shelves, now I have room on the floor for a small shelf.

This little shelf only cost $12 at Lowes and takes up only 12 x 12 inches of floor space.  The brown woven basket is for junk mail (the shredder is in the basement).  The small white wire basket is for dirty kitchen towels or the socks that get peeled off after working in the yard.

Speaking of socks, there are always lonely socks who have lost their mates in a laundry room.


This is probably my favorite part of the laundry room now.  I just took a scrap of lumber, about 1x3 inches, painted it, distressed the edges a little, and glued clothes pins on it.  Be sure to put a couple of bumpers on the back side to protect your wall when you press the clothes pins open.


I think every household fights paper...receipts, photos, ticket stubs, reminder notices.  If you have room in the laundry room, put up the largest bulletin board that will fit (you could pin your lost socks on it too).

We have a baby gate that is used for the dog, only she's much better behaved now.  I had been stashing the baby gate next to the dryer, then I realized it could make a handy shelf if I turned it on its side.


The support bracket for the shelving holds a hanger with extra placemats and the tablecloth for the patio table within easy reach but out of the way of daily traffic.


And let's not forget behind the door.  3M Command hooks are expensive but I love that they hold so much without having to drill into the doors.

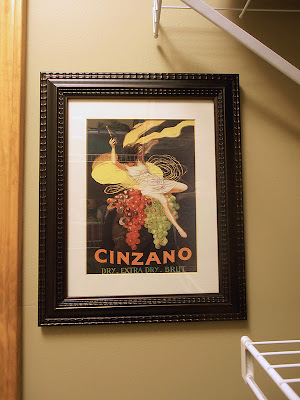
Every room needs a little art, but I'm not a fan of cutesy laundry-themed wall decor.  I found this print at Goodwill for only $3.


The colors are great, but I thought the frame was rather boring so I switched it out with another frame I had on hand.


So for a small investment for the wooden shelf and the hanging wire baskets and a little imagination, my laundry room now looks like this:


I'm linking up...
Coastal Charm
Savvy Southern Style
Handy Man, Crafty Woman

Monday, November 14, 2011

Christmas Pillows

The Christmas pillows are back in my Etsy shop!

My pillows are completely handmade with 100% linen and cotton applique.  I prewash the linen so it has a wonderful soft feel.

The black and cream damask was the most popular last year.  This year's version is a little larger.


I also offer it with a green bow as well.

Want a little more color?  I found this great fabric filled with Christmas colors and a traditional damask-like print.


If you are looking for something a little more manly with a cabin feel, I have a new plaid pattern this year.


I'm offering PRIORITY MAIL shipping on the Christmas pillows so you'll have plenty of time to enjoy them this holiday season.

Sunday, November 13, 2011

It's Finished!


The deadline is approaching and I did it! 
Yes, the quilt is finished, boxed and ready to ship!

If you are new to this blog, I started a twin-sized quilt last January and I'm donating it to the Department of Social and Rehabilitation Services (SRS) of South Central Kansas.  It will given to an anonymous child who is living in foster care this Christmas. 

Several kind readers from across the country donated their fabric scraps and shared their own charity quilting stories.


I'm very proud to continue the tradition of quilting in my family.  I have cherished the quilts that my grandmothers and great-grandmothers made.  Even as a grown woman, I'll curl up in one of those quilts if I'm having a lousy day. 

It's one of the best feelings in the world.

I'm so happy to pass along that warm embrace to a child who might really need some comfort.


A special thank you to everyone who helped to make this quilt possible!


I'm linking up...


Monday, November 7, 2011

Just in Time for Winter

We had snow in our forecast last week.  Thankfully, Mother Nature didn't deliver.

The day before Halloween I swept the front porch in anticipation of the trick or treaters, and then looked at the bushes.  The pyracantha was encroaching on the sidewalk (again), so I decided to give it a quick trim.


This bush is a beast.  I decided to take it a step further and really went after it with the hand pruners.


There are 6 inches of sidewalk that haven't been seen in years!  I love that the pyracantha has shape now and visual interest around the trunk rather than just being a solid green mass.  Next spring, I'll begin trimming it back even further, but I'm very pleased with it now.

Our maple came into its full color last week.


And I finished the quilt last week!  Pictures coming in the next post!

Saturday, October 29, 2011

Hemming Jeans

I'm an average height, pear shaped gal.  I dreaded the day skinny jeans came back in style.  I miss straight-leg jeans.  Please, please come back.

Pants are always a challenge and jeans are a nightmare with their unflattering thighs and baggy waists.  I'm a thrifty gal, but I'll pay anything for a decent-fitting pair of jeans.

Did you read that?  ANYTHING.

So I was pretty excited when I found a like new pair of jeans at a local consignment shop for $20. 

They would be perfect...if I was 5'9".


I bought them anyway, ran them through the wash and blasted them in a hot dryer.


Still too long and sloppy, even for my high-heeled boots.

I remembered seeing a tutorial on how to hem jeans and keep the original factory hem.

And it worked.  It was so easy!

First, determine how much you need to raise the hem.  For this pair of jeans, it was 1 1/2 inches.

Divide that number in half, which is 3/4 inch.  This is the number you will use in the next step.

Cuff the jeans, measuring from the original hem, and pin around the leg opening.  A sewing scale speeds things along with this step.


Using a denim needle and a zipper foot, stitch as close as possible to the original hem without sewing on top of it!  If you machine has a left-right needle adjustment, use it to get really close to the hem.


Finger-press the seam, then try on the jeans before starting the other leg, just in case you need to make any adjustments.

Repeat on the other side, try on the jeans one more time to make sure they are the correct length, then press the seams with an iron.  In order to avoid shiny denim, iron from the inside of the pant leg and avoid directly ironing the top crease of the cuff.


Admire your favorite shoes since you can see them again.


You can fire your tailor now.


I'm linking up...