Friday, May 11, 2012

Mary Carol Garrity Spring Home Tour

After visiting Mary Carol Garrity's home last autumn, I knew I had to go back for her spring tour.  Ready for some eye candy?


Mary Carol is a gracious hostess, greeting everyone at the front door.  I'm always too bashful to ask for a picture.


In a time when chippy, distressed painted furniture is EVERYWHERE, I love that Mary Carol's style is traditional at heart (although I'm not really sold on that slipcovered chair).


I love this little nook she carved out of the foyer.


And if there is one thing she's good at, it's arranging a tray.


The den is right off the foyer.  It's very dark and masculine.  I couldn't get good pictures in there last year with my point-and-shoot, so I took along the DSLR this time.  Notice the TV on the drop leaf table?  Love that!


You know what else I like?  She doesn't obsess over hiding the cords.


In her most recent blog post, she said that she's excited about the use of color.  I'll be honest, I thought her living room had some hits and some misses.

The coral pillows with the accent vase = Hit!


The geometric pillows against the antique painting?  Hmm...


Moving on to the dining room. 

My jaw dropped.


OK, I'll admit, it's not my style.  But the place settings were very pretty.


And check out her sideboard!  Do you see it?  See the basket filled with empty wine bottles?


Yeah, I copied her.  Copied it with an old laundry basket!  See my version here.

Everytime I see her breakfast area, I reconsider my thoughts jettisoning our whimpy nook in my dream of a future kitchen remodel.


Imagine spending long winter evenings with friends and family around a fun board game at this table.  And I hate board games! 

Note to self: My pets deserve fancier bowls.


And if you are wondering, her historic home has a kitchen which is small charming.  That gives me hope for ours, which is also charming small.

I do love this vignette next to the stove.   Another note to self.


Another testament to the power of a good tray.  I wish my junk mail looked this good.


Are you overloaded yet?  Shall we to go outside?

Don't you love this heart-shaped stone at the garden entrance?


Everyone was gushing over the blue hydrangea.  Rightfully so.  They seem to be very tempermental in these parts.  My own hydrangea is impressively...wilted.


Honey, you don't contemplate it.  You drink it!


Personally, I think gardens have enough green in them, so I would have liked a little more color on the table.


Regardless, the place settings were lovely.


I loved the conversation area.  I really had to fight the urge to straighten that pillow on the right for my picture, but it just seemed rude for me to restage it.


Besides the trays, the other thing I think Mary Carol Garrity does well is layering textures and finishes, like weathered garden statuary side by side with glossy ceramic planters.


I think this is why her look is so popular and why women were arriving BY THE BUS LOAD to tour her home.  She makes marrying the old and the new together look so easy.

Of course, I braved the crowds in her two stores in Atchison, KS, Nell Hills and Garrity's Encore, and I didn't come away empty handed.  I'll be sharing my interpretations, and I hope you have been inspired too.

If you pin, please be sure to give Mary Carol credit for her work.

Monday, May 7, 2012

Random Garden Thoughts

This is my first post since Blogger changed their dashboard (grumble).

The first weekend of May is traditionally our big planting weekend, with fingers crossed Mother Nature doesn't surprise us in the next 10 days.

This year, we planted the last weekend of March, and the clerk at the nursery warned us about putting the tomatos in the ground.  Snort.  They need to be staked and soon!

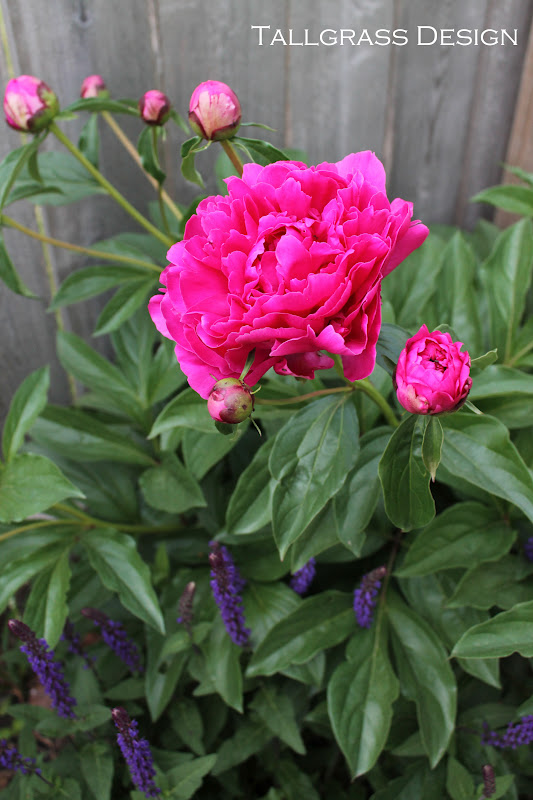
The peonies were just about finished blooming Saturday morning. We had heavy rain with a little hail Sunday morning, which probably finished off the blooms.


I'm running out of room in the existing flower beds, so this year I decided to focus on bringing other decorative elements into the garden and doing it for as little money as possible since I have bigger projects I'm saving for now.

Thanks to Craigslist, I scored a trunkload of goodies from someone who was clearing out a garden from an older home last year, including two chippy, rusted wire baskets.  I discovered they looked pretty good nestled inside one another, but I wasn't sure what to put inside it.

I've been taking cuttings from my sedums and starting them in small terra cotta pots.  I feel stupid for ever buying sedums because they are so easy to start from cuttings.  Just cut off a small stalk and stick it potting soil.  So now I have all these little pots of sedum setting around the deck.  Then I rememered those wire baskets.

I picked up a jade plant at the garden center and moved the aloe outside as we do every summer.  Don't they look great clusted together?


More recycled and dumpster-diving finds to come!

Monday, April 16, 2012

Not So Vintage Market Basket

When I visited Mary Carol Garrity's fall open house last year, I noticed she had a large market basket tucked under a sideboard, and it was filled with empty wine bottles.  Being known to tip back a glass (or two...nevermind, just give me the whole bottle), I loved the look.

(By the way, Mary Carol's spring open house is less than a month away!)

And who doesn't love a great vintage market basket?  But I'm way too cheap to buy the real thing.

But I do have one of these at the back of the closet that's doing nothing better than holding socks whose partners are l-o-n-g gone.  It's about 15 years old and it has seen lot of use hauling laundry up and down the stairs until it started to unravel at the top, which is when it was retired to become the gathering place of the Lonely Sock Club.


The size is perfect.  But that color is so 1990s.

Vintage = good
Dated = bad

Let's gather some supplies.


I evicted the singles club of socks and their tag-alongs, the dust bunnies, then sprayed the basket with oil rubbed bronze paint, which improved the look immediately.  But the color was a one-dimensional, so I gently brushed it with the Brunt Umber craft paint with one of my favorite tools, a chip brush.

After letting it dry, I hit the high points in the weave with the Pinecone Brown craft paint, blending it into the weave.  Finally I sealed it with a clear spray.

There are always plenty of wine bottles in the recycling bin, but eventually I'll fill it only with the bottles which were part of special occasions.


The best part?  It cost me NOTHING.  I love the subtle colors on the handles.


It's so fun to find ways to get "the look" for less!


I'm linking up...

Thursday, April 12, 2012

Ten Years in the Making

This past winter I found pieces of two quilts I started about 10 years ago inside a long-forgotten box in the basement.

My first two quilts.  Quilt #1 is nothing but a few squares so far.

This one is the second quilt I started and the third one I actually finished.  You can see last quilt I made here.

Originally I envisioned this as queen-sized.


It ended up being lap-sized.

Saturday, March 31, 2012

Basic Table Runner

I blame Spring's earlier-than-usual-arrival for my creative funk.  It was almost HOT here this week.  Some people are saying we could reach 90 this weekend.  It's not even April yet!

The yardwork is calling.  There were indoor projects planned.  I've been battling colds and seasonal allergies.  And there are never enough hours in the day.

But I did finally put away the Christmas table runner this week.  In my defense, it's not technically a Christmas pattern.  It's just green, gold and red.

Yeah, kind of Christmas-y.

Our dining room table is large (one of my pet peeves is being crowded when I'm eating), so a custom runner was necessary.  I finally found a print that could carry me through several seasons, Christmas excluded!


This is so easy to make, you hardly need a tutorial.  First, determine the width and the overall length of the runner.  I like the points to hang about 3 inches above the chairs at the head of the table.  If you are sewing the seams, add a half inch seam allowance to all sides.  You can use Stitch Witchery as well.  Just  add the necessary allowance to create a hem when you fuse it in place.

If you are using a sewing machine, fold one side under 1/4 of an inch then fold it over again 1/4 inch.  Stitch along the edge.  If you are using Stitch Witchery, just fold it over as much as you need to cover the fusing and iron according the manufacturer's instructions.  Repeat on all four sides.

Fold each end neatly to make a point and press with an iron.


Tack the flaps in place with about a 4-6 inch long seam. 


If your fabric has a print and you can match the thread closely, you'll hardly see the stitching on the front side.


That's all there is to it!


Thursday, March 15, 2012

Floretine Dreams

In honor of our first trip to Italy 10 years ago this March, may I introduce the latest addition to my Etsy shop:


Actually this print reminds me more of Siena than Florence, but you get the idea.


This canvas tote is available here.


Wednesday, March 14, 2012

Random

I'm having issues with focus.


I pulled all the books off the bookcases in the basement several weeks ago.  I rearranged the three mismatched bookcases and gave up.

I asked the spousal unit if we can retire the old bookcases and get new ones that matched.  Nothing fancy.  He said "Not right now."

Sigh.

I'd really like to check out Ikea's uber-affordable Billy system, but we live in an Ikea dead-zone.  The shipping charges alone for three Billys is $349.  I could drive to the nearest Ikea 8 hours away, stay the night in a decent hotel, and then drive 8 hours home. 

Better still, just stay home.  I'm sure I can find three nice bookcases locally for less than $500.

Moving on...

I've been dusting off my painting skills, mostly abstract landscapes.  The husband has been dropping serious hints about his dislike of the generic Tuscan scenes I bought several years ago at a national retailer who shall remain nameless.   


Let me practice a little more and then I'll share.

Moving on...

I've started cutting out pieces for a new quilt.


I'm going with a different pattern this year.  Here's a peek.


Next...

My big accomplishment last week was replacing the ball rod assembly in of the bathroom sinks.  That's the gizmo under the sink that makes the drain stopper move up and down when you pull on the little knob next to the facet handle.  Not really a blog-worthy project.

We have six bathroom sinks in our house.  I've replaced four of these ball rod assemblies.  I'm pretty flexible and I have long fingers so I'm pretty good with under the sink work.

I did re-paint this cute little tray I found at a thrift store to corral my hair styling products.


I spent last Saturday cleaning out dead brush and remaining leaves.  Mid-way through mowing the back yard, the self-propeller on our 14 year old mower stopped working.

We'll see what it takes to fix it.  Buying a new lawn mower is going to take a serious bite from my garden budget this year.

Bummer.

So the books are still scattered on the floor.  The painting is finished but not hung on the wall.  The quilt is about 1/3 cut out.  This week I'll have to load the icky, dirty lawn mower into car to get it fixed.

Maybe this week will be more inspiring.